Your logo represents your brand. When it transforms into embroidery, every stitch must land exactly where it should. BAi embroidery machines are powerful commercial systems capable of exceptional work, but they depend entirely on the quality of the files you feed them. Understanding the professional digitizing techniques to Convert Logo to BAi Embroidery File ensures your machine runs smoothly, your production stays efficient, and your brand looks its best.
BAi machines read DST files, the universal language of commercial embroidery . But a DST file is just a container. The quality inside comes from skilled digitizing that accounts for fabric behavior, stitch engineering, and production efficiency.
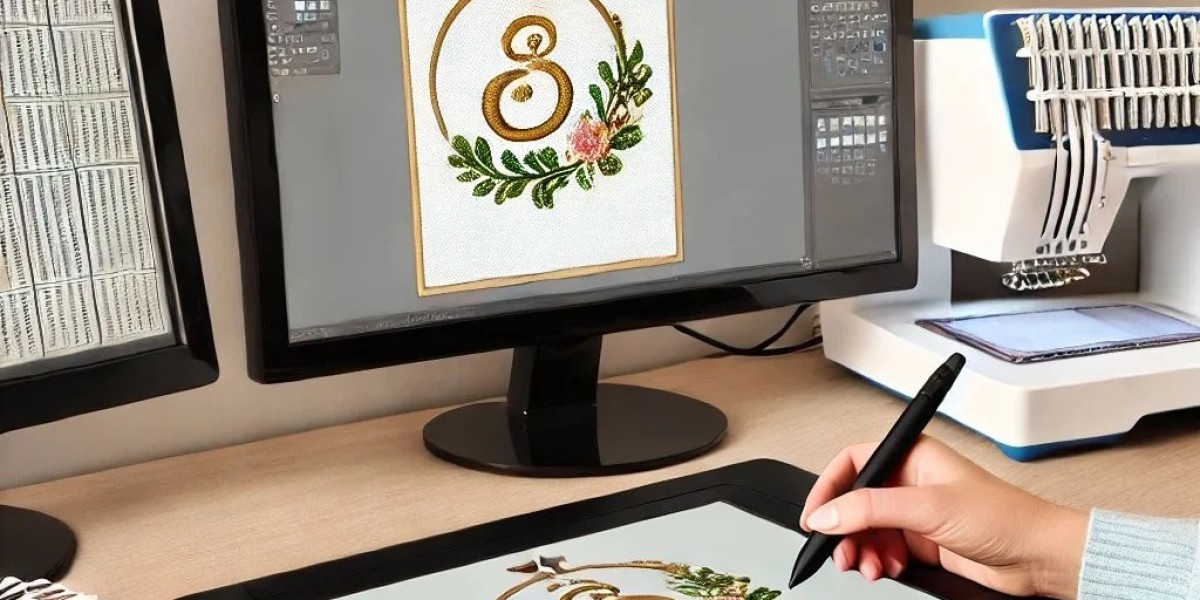
Let me walk you through the professional techniques that transform your logo into a flawless BAi embroidery file.
Understanding What Professional Digitizing Achieves
Professional digitizing is not about pushing a button. It is about making hundreds of deliberate decisions that affect how your logo stitches.
Clean edges come from choosing the right stitch types and angles.
Even fills result from calibrated density and proper underlay.
Perfect registration depends on accurate pull compensation.
Smooth production flows from optimized stitch paths and color sequences.
Durable construction requires secure tie-ins and tie-offs.
These elements work together. Skip any, and quality suffers. Master all, and your logo emerges as beautiful embroidery.
Professional Technique 1: Start with Clean Vector Artwork
Professional digitizers never start with low-resolution JPEGs when vectors are available.
Vector files like AI, EPS, or SVG contain mathematical paths instead of pixels. They scale infinitely without losing quality. They have clean edges that digitizing software can interpret accurately. If your logo exists as vector art from a graphic designer, you have the best possible starting point.
If you only have raster images (JPEG, PNG), professionals clean them up first. They remove stray pixels. They simplify overlapping shapes. They ensure text is large enough to remain readable when stitched.
The goal: Provide the cleanest possible paths for digitizing. Every imperfection in the source becomes an imperfection in the stitches.
Professional Technique 2: Set Correct Dimensions Before Digitizing
Professionals never start without knowing the final size.
Measure the actual embroidery area on your target garment. Left chest logos typically run 3 to 4 inches wide. Hat fronts run about 2.2 inches tall by 4.5 inches wide. Jacket backs go larger, sometimes up to 12 inches or more.
Set your software workspace to these exact dimensions before you import your artwork. If you digitize at one size and later resize, stitch density changes. Too dense causes puckering. Too light leaves gaps.
Create separate files for different placements. A design optimized for 4 inches does not automatically scale to 10 inches without losing quality.
Professional Technique 3: Choose the Right Stitch Types
Different parts of your logo need different stitch types. Professionals choose intentionally.
Satin stitches work for borders, text, and narrow columns up to about 12mm wide. They create smooth, shiny edges that define shapes clearly. For your logo's letters and outlines, satin is often the choice.
Fill stitches (tatami) cover large solid areas. They create a textured surface that looks consistent from a distance. For backgrounds and large shapes, fills provide even coverage.
Running stitches handle fine lines, details, and underlay. They provide structure without adding bulk.
Specialty stitches like bean stitches or triple runs can add emphasis to specific elements.
Professional Technique 4: Engineer Underlay for Your Fabric
Underlay is the hidden foundation of professional embroidery. Professionals never skip it and always match it to the fabric.
For stable wovens like denim or twill: Edge run underlay along outlines prevents edges from sinking.
For stretchy knits like polos: Center run or zigzag underlay stabilizes the fabric and prevents distortion.
For fleece or terry: Heavy underlay prevents stitches from disappearing into the nap.
For caps: Specialized underlay accounts for the curve and the buckram structure.
The principle: Underlay must be sufficient to stabilize without adding bulk. Professionals test and adjust based on fabric behavior.
Professional Technique 5: Calibrate Density for Coverage and Feel
Stitch density controls how close stitches sit together. Professionals balance coverage with flexibility.
For light fabrics: Slightly higher density prevents show-through. The fabric is thin; stitches need to cover without being visible from behind.
For heavy fabrics: Lower density prevents stiffness. Thick materials don't need as much thread to cover.
For stretchy fabrics: Density that allows movement without distortion. Too dense restricts the fabric; too light leaves gaps.
For most applications: 0.4-0.5mm between stitches for fills provides the right balance.
Professional Technique 6: Apply Precise Pull Compensation
Thread tension pulls fabric together during stitching. Without compensation, your logo stitches smaller than intended.
For stretchy fabrics: Higher compensation values (0.3-0.4mm)
For stable fabrics: Lower compensation (0.1-0.2mm)
For satin stitches: Compensation is especially critical—narrow columns can disappear without it
The result: Your logo stitches at exactly the intended size. Outlines align with fills. Text stays crisp and readable.
Professional Technique 7: Plan Stitch Angles Intentionally
Stitch direction affects how light reflects off your logo and how it interacts with fabric grain.
For text: Stitches typically run perpendicular to letter strokes for clean edges.
For fills: Angles vary to create visual interest and structural stability.
For borders: Perpendicular to the edge for clean definition.
For curved elements: Contour stitching follows the natural flow.
Structural principle: Alternating angles between layers creates a plywood effect that resists distortion.
Professional Technique 8: Optimize Stitch Path for Production Efficiency
The order in which your BAi stitches affects production time and quality.
Color sequence: Group similar colors together. Stitch small details first, then larger areas. This minimizes thread changes and keeps the machine running.
Stitch path: Connect areas that can stitch continuously. Minimize trims and jumps. When jumps are necessary, make them as short as possible.
Registration: Consider how colors layer. Dark under light may shadow through; sequence accordingly.
Production impact: A file that adds 30 seconds per piece adds over four hours to a 500-piece run. Optimization saves real money.
Professional Technique 9: Add Secure Tie-Ins and Tie-Offs
Tie-ins secure the beginning of a stitch sequence, preventing thread from pulling out. Tie-offs secure the end, preventing unraveling.
Placement: Professionals hide these small stitches where they will not show—under other stitching, along edges, or in areas that will be covered.
Jump stitch management: Long jumps across open areas create loose threads that can catch. Strategic placement of trims and tie-offs minimizes this risk.
Professional Technique 10: Use Quality Assurance Testing
Before any file reaches production, professionals verify their work.
Virtual simulation: They watch the design stitch in software, looking for inefficiencies, registration issues, or unexpected behavior.
Physical testing: Many professionals test on actual fabric to confirm settings work as intended.
Revision process: If issues appear, they adjust the file and test again. This cycle continues until results are perfect.
Professional Technique 11: Choose the Right File Format
BAi machines read DST files. This is the universal format for commercial embroidery.
What DST contains: Stitch coordinates, color change points, trim commands, and jump moves. It does not store color information, only where changes happen.
What you need: A color sheet or thread chart with your DST file. Document which threads correspond to each color change.
Master files: Keep editable versions (EMB, PXF) for future modifications. DST is for production only.
When to Apply These Techniques
These professional techniques apply to every logo you digitize. But some situations demand extra attention:
Complex logos with fine details need careful stitch planning
Caps require center-out sequencing and specialized underlay
Small text demands precise compensation and density
Bulk orders benefit from path optimization
Specialty techniques like 3D puff need specific approaches
Professional Digitizing Services
If you prefer to focus on production rather than digitizing, professional services bring these techniques to every file.
Absolute Digitizing has been providing digitizing since 1999. Their in-house team delivers consistent, premium quality.
Digitizing Buddy brings decades of experience to every logo, offering design advice based on what works.
Cool Embroidery Design adds creative flair for unique effects and fashion branding.
Absolute Digitizer focuses on production efficiency for high-volume runs.
These professionals apply the techniques described here to every file, ensuring your BAi machine runs smoothly and your logo looks perfect.
Conclusion
Converting your logo to a BAi embroidery file using professional digitizing techniques transforms your brand from flat artwork to dimensional thread art. Start with clean vector artwork. Set correct dimensions. Choose the right stitch types. Engineer underlay for your fabric. Calibrate density. Apply pull compensation. Plan stitch angles intentionally. Optimize stitch paths. Add secure tie-ins. Test thoroughly.
These techniques ensure your BAi machine runs smoothly, your production stays efficient, and your logo represents your brand with pride. Whether you digitize in-house or partner with professionals, these principles deliver the quality your brand deserves. Your BAi is capable of exceptional work. Feed it professionally digitized files, and it will reward you every time.